HKpowerStudio

Creatively Organized Spaces

  • Home
  • About
  • Services
    • ORGANIZING & APPRAISAL SERVICES
    • ART ORGANIZING & DESIGN SERVICES
    • VIRTUAL SERVICES
    • Home Inventory without Heartache
    • Projects
  • Blog
  • Resources
    • Custom Closet Design
    • Vision Board Workshops
  • Media
  • Connect

Planner Roundup and Review

September 20, 2017 by Heather Filed Under: Paper management, Productivity, Systems & Techniques, Tips & Resources, Uncategorized 1 Comment

I have used so many types of planners that I thought it might be helpful for me to share my planner roundup and review of what I’ve learned over the years. This is only a review of planners I have personally used or used with clients. Each of us needs to use a system that supports productivity and keeping track of scheduled appointments and sometimes tasks. If you have tried and failed or are not sure what to try, this will give you some ideas of where to start. And remember, if you’re not using a planner of some sort you’re using your brain as a storage device.

Your Brain is Not a Storage Device!I use my planner for appointments, tasks and goals. Some of you may only use a planner for appointments or may use a combination of two systems. Using more than one planner system can work for some people, just like using a paper planner may be best for some and digital works better for others. There are a lot of options to choose from so hang in there as I run through some of my favorite Planners in review here.

Paper vs Digital, I’ve used both and still do to some degree. I am finding a return to paper planners all over these days. There are a lot of tech savvy people who love paper planners and there are others who don’t want to carry anything additional around with them. Making a decision about paper or digital is personal and should be based on several factors including:

  • How tech savvy are you?
  • What’s your lifestyle and schedule…do you forget things easily?
  • Do you love the feel of a paper book and love writing by hand?
  • Who do you need to share events with (family members, work team etc)?
  • Did you learn any planner techniques that have stuck with you? If so can you build on those systems?

My Planner Use Timeline…A Planner Roundup and Review of 6 Systems

I started using the Franklin Covey system when I was in High School and learned some pretty awesome skills for productivity, setting goals and planning my time. The Franklin system was developed by Stephen Covey author of The 7 Habits of Highly Effective People. I primarily used this system in my later years of High School and college in an effort to become a better student and develop leadership skills and many of these skills and techniques have stuck with me! There are several sizes and styles of Franklin planners and they are beautifully made and can be specifically tailored to your needs. Take the quiz to learn your Franklin planner style here. I honestly think all planners in a way were born from the Franklin system…but that’s not based on scientific study:)

I eventually downsized from the Franklin system (I found it a bit too bulky) and incorporated a more simplified and some may say Sexy version of goal setting and time management with my Filofax. I confess that a good part of my choice to switch had to do with the aesthetics of the simple and sophisticated looking Filofax. I used this system from college into early professional years and this system, like the Franklin predated digital calendars and planners. I incorporated some of the goal setting skills and time management skills I learned from Franklin Covey into my Filofax use…I had a good foundation in place and felt I could easily create my own goals without as many specific prompts.

Along comes the digital world…I flirted with, tried and used Outlook, Google Calendars and other calendars for awhile (probably a good 10 year period) but found that with digital calendar systems I was not capturing my goals as well as I did when I used a paper planner. What I love about digital systems is that they can be entered and shared via multiple devices or people and are available anywhere via access to that digital account. I still use Google calendars for certain things…I’ll explain in more detail below.

I finally returned to a paper planner in the past 7 or so years because I felt the need to see my goals broken down into specific measurable tasks that I could assign daily, weekly, monthly alongside my appointments…on paper. I tried to use the Filofax system but didn’t like how bulky it felt, it was more than I needed. I downsized to a small Moleskine and started learning about Bullet Journaling since there is little structure to the Moleskine system. I don’t feel the need for as much guided structure now since I have years of experience using more other systems.

A few years ago I decided to try Danielle LaPorte’s Desire Map Planner which at that time was similar in size and structure to a medium size Moleskine but with some of her wisdom about Core Desired Feelings and Truth Bombs sprinkled through to keep my goals focused on the bigger picture of how I want to live my life with intention. I eventually went back to the Moleskine system two years ago and will probably stick with that again next year BUT I will be giving away two Desire Map Planners between October and December! Her new planners are beautiful, spiral bound, full of inspiring and motivating prompts and a wonderful tool for anyone who doesn’t need to take their planner everywhere or doesn’t mind something a bit more bulky (the primary reasons I won’t be using them but wish I could!). Follow me over on my Facebook Page and Instagram to learn more about the planner giveaway and share with your friends!

A hybrid system that works for me…I am currently and plan to continue to use a bit of a hybrid system with both my Moleskine (week at a glance medium size) and Google Calendars. I use digital calendars for shared and recurring events and I use my paper planner, with PENCIL-always pencil, for appointments and personal/business goals. I incorporate some Bullet Journal techniques (some of the symbols and color coding) because I like the creative aspect of the system. Some people create works of art with their Bullet Journals! I don’t quite go that far:)

A last note about using digital calendars. I love the color coding and sharing features of Google Calendars and have pretty much used this digital system exclusively. I use the digital format whenever I purchase event tickets and want the info to be available on my device. I also jot a note of the time in my paper calendar-some people might not want to do this duplication! I use color coding to keep track of larger goals for my business like blog themes, newsletter publication and recurring volunteer/meetings. The format is pretty intuitive to use, there are lots of tutorials available and it’s an app that can be downloaded to almost any device. It’s also compatible with iCal (which has some similar features). I’ve worked with clients to use iCal but in my opinion it’s not the best tool for goal setting or tasks, only for setting appointments and events.

So, currently a hybrid system (mostly paper with recurring events digtal) is what works for me! I have shared this technique with others and they have adopted their own variation of a hybrid system. I’ve long wished that someone would come out with a paper calendar that captures everything digitally and it seems that Moleskin will be doing this in 2018, I’ll be giving that a try!

What planner systems have you used, what’s worked and what has not? Please tell me your favorites and don’t forget to follow me on Facebook and Instagram to learn more about the Desire Map Planner Giveaway’s!

Taking Time Out for Productivity

September 7, 2017 by Heather Filed Under: Inspiration & Education, Productivity, Systems & Techniques, Wellness & Mindset Leave a Comment

I’m returning today for a quick check in because Taking Time Out for Productivity-for the SAKE of Productivity-has been on my mind lately. I’m working on incorporating small breaks into my daily practice and scheduling these into my days. This is one small way we can give ourselves a little self-love and take care of ourselves in a more nurturing and intentional way.

Time Out for Productivity

Time Out for Productivity can be an effective strategy in our daily lives to combat boredom, distraction, stress and a lack of inspiration!

Many experts agree on different methods of time out or scheduled boredom as some call it.  The idea is to give yourself the space and time to breath, think or allow your mind to wander, to dream so that when you are deeply entrenched in a project you don’t get so easily distracted by all those “shiny objects”, whether they be emails, social media, politics/news, the kids, co-workers chatting in the next cubbie etc…

Time out can become a daily practice, stop once an hour if you work at your computer and get a drink, go to the bathroom, step outside or whatever. Come back refreshed and ready to focus again.

Once a day schedule a 10-15 min break to DO NOTHING!  It’s a practice of mindfulness, daydreaming or even meditation.

Taking Time Out for Productivity and allow your mind to wander freely so that when you need it to stay focused it’s a little more cooperative.

This scheduled boredom can be sitting in a chair, lying down or however you are comfortable but you should be in a place where others will not disturb you (including phone’s, kids, pets or co-workers).

I’ve been working on incorporating both of these practices into my daily habits.  Working from home required a great deal of discipline but I’m finding that these scheduled breaks really help me stay on task and focused when I really need to crank something out.

Do you schedule breaks or time out for yourself in your daily practices?

Save

Photo Organizing Old-School Style

August 7, 2017 by Heather Filed Under: Kids & Family Organizing, Organize, Organizing Projects, Paper management, Systems & Techniques, Tips & Resources, Uncategorized 2 Comments

I had someone ask me to cover the topic of Photo Organizing this month so here we go! I have never gone too far into this subject here on my blog because it’s quite a HEFTY topic to cover in one post. Here are the basic’s for paper photo organizing systems, I’ll return to cover digital photo organizing another time. It’s helpful to know before you begin if you will be doing this yourself or hiring help. There is an entire trade organization, APPO, dedicated to Photo Organizing!PHOTO ORGANIZINGMost of us want to keep at least some photo’s to look at in frames, albums or loosely. But we don’t get to enjoy the photo’s we love because they are in a big jumble with the one’s we don’t care about, the duplicates, damaged photo’s and photos of people you have no clue about!
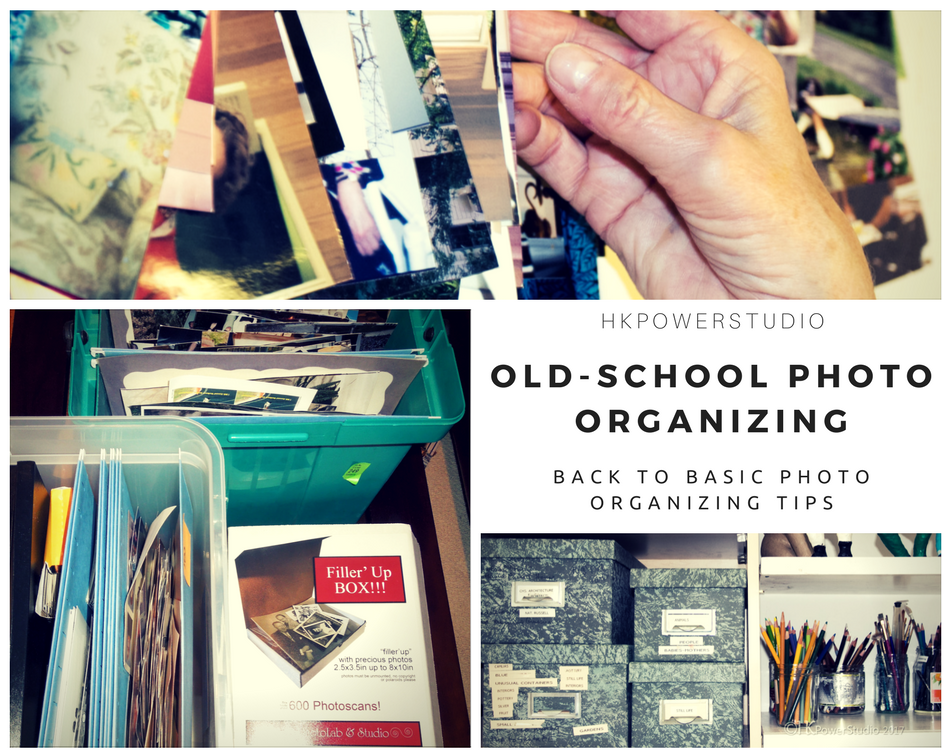
Chances are that at some point you will be inheriting old photo’s if you haven’t already.

To Digitize or Not? Since many of us don’t print photo’s anymore, at least we know the quantity of printed photo’s isn’t growing exponentially! If you’re someone who still prints photo’s, stop doing that until you have a great system in place. You may also want to digitize your photo’s but it’s best to sort and purge what you don’t want first, deciding what you want digitized as you go. If you’re beginning this process with the thought of digitizing, you may want to buy a package for this service. Companies like Legacy Box send you a box that you can fill, return and have scanned. The box is returned within 1-3weeks with original photo’s as well as your digital photo’s (on a CD).

Gather all your photo’s into one area to work on. This can be a fun project to work on when your Binge watching a favorite series:) Before you begin, have a method to sort photos into such as file folders, shoe boxes, large envelopes, plastic bags etc.Photo organizingLabel with temporary labels to keep track of what you have sorted, eventually permanent labels will be attached to bins or albums.
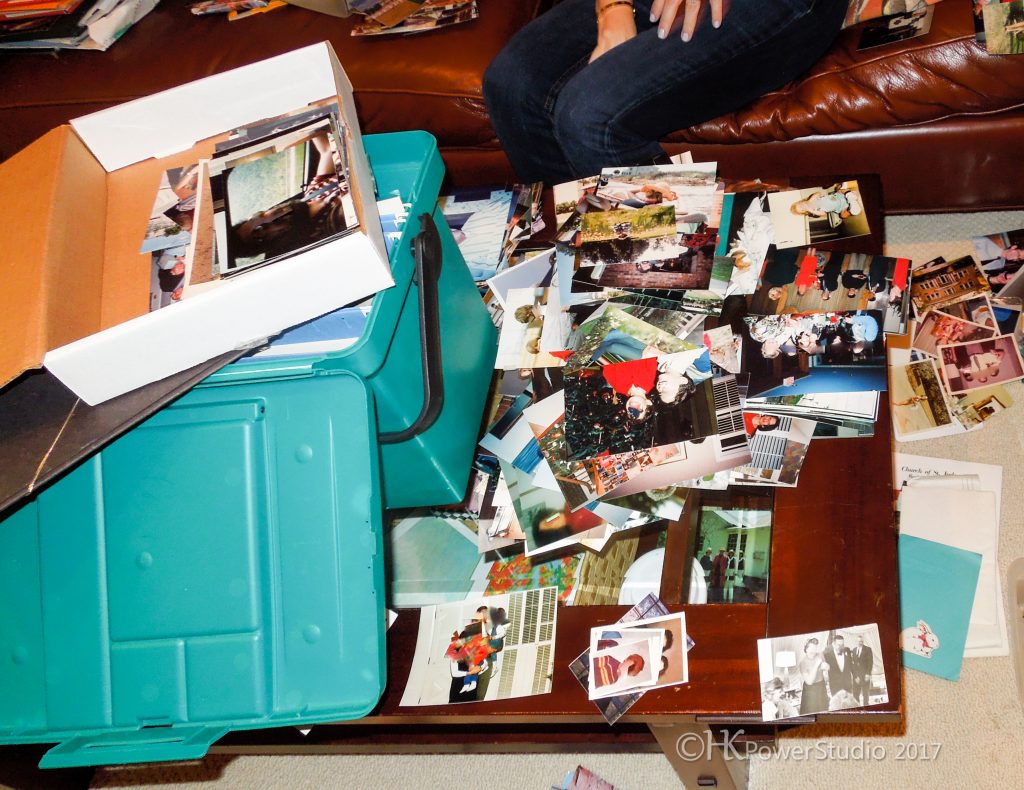
Handling…if you have very old, fragile or valuable photo’s you may want to wear lint free cotton gloves while working on photo’s to keep oils and moisture from damaging them. You can also wipe the photo’s gently as you go. If you find photo’s stuck in albums, don’t force them. Try prying up a corner with something like a flat spatula and dental floss! The floss can be used to “saw” the under side of the photo from the adhesive backing. If you still can’t get it, set it aside and get professional help. Don’t write directly on the backs of photo’s with anything other than an archival pen, I like these.Photo OrganizingSort photo’s chronologically and/or by event or person. Your system may be some combination of these. As you start the process of sorting and purging, think about other family members or friends who you might want to send photo’s to and set them aside (labeled) to give them when you’re done. If you’re not sure who someone is, snap photo’s of the photo’s as you go and text or email someone who might be able to help you ID them. It can be fun to share “vintage” photo’s with family and friends as you go! Keep track of what size the majority of your photo’s are and if you plan to organize into albums or boxes, this will be important to know.
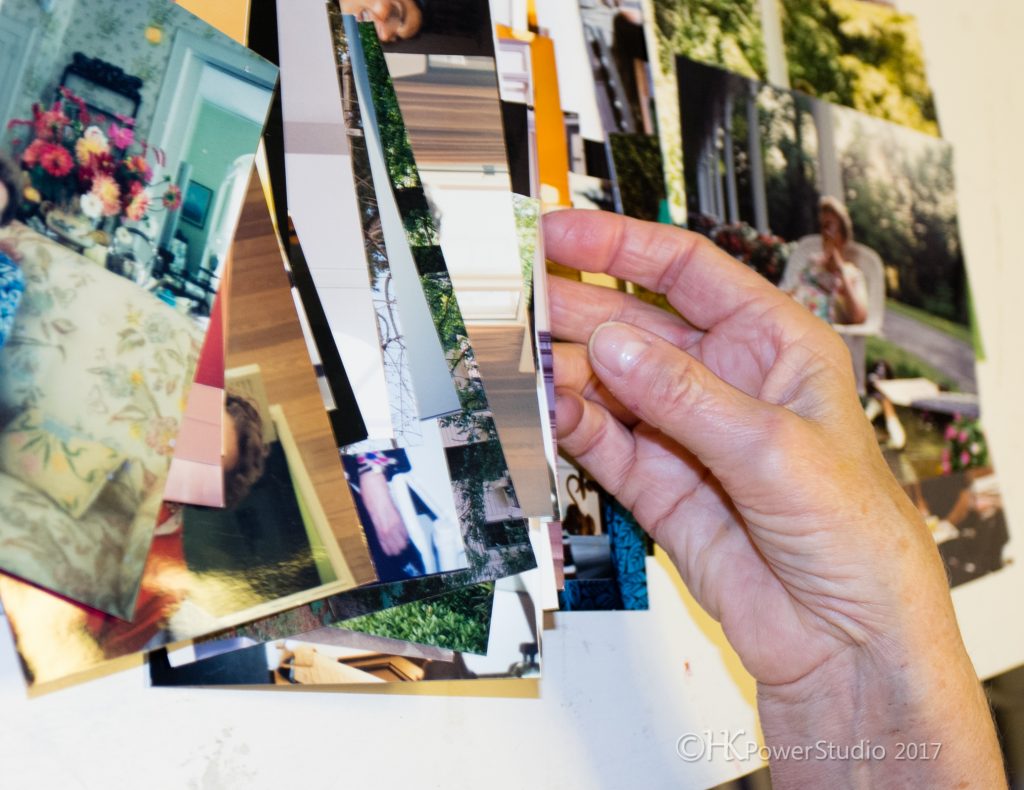
Storage can be decided on once you have finished sorting and you know what size collection you have. If you plan to digitize, send the photo’s off at this point. Do your research before you buy storage containers. Look for Archival quality boxes and albums. If your photo’s are standard 4×6 or 5×7 you will have a lot of options to choose from. Remember that larger boxes will get very heavy. Use archival paper dividers to further separate photo’s by category or date and label the cards with detailed information about events, family members etc. Don’t use sticky notes or clips that can damage the surface of original photo’s. If you have negatives that correspond to the photo’s you are keeping, label the plastic sleeves they come in to correspond to the storage system you are creating and store negatives separately. Keep your photo’s in climate controlled, low humidity and light conditions to best preserve them.PHOTO ORGANIZINGCross reference storage-Note in your photo box what negatives and digital photo’s you have copies of and where they are stored (on CD’s, cloud, external hard drive, separate bins etc).

Maintain your system on a regular basis if you are adding to your paper photo collection or if you inherit photo’s. I’ll share tips for organizing your digital photo’s in a later post. This is a great time of year to work on photo organizing and perhaps create some beautiful books with some of the old and new photo’s you come across. Have fun traveling down memory lane!


3 steps to stop clutter before it starts!

July 25, 2017 by Heather Filed Under: Organize, Organizing Projects, Systems & Techniques, Tips & Resources Leave a Comment

If you can recognize personal patterns in these 3 key areas of your life, you will be on your way to stop clutter before it starts! These are ongoing aspects of life that require practice to create lasting change. With a level of self awareness and a plan, we can stop clutter before it starts and begin to live a more simple life.

Stop Clutter

Stop Clutter before it starts by sharing experiences not things.

We want people to know how much we care about them, often this is expressed via the exchange of gifts. Some people love to buy gifts, some people love to wrap and give gifts, some people cringe when they see a gift because they feel they already have too much stuff. Whether you are the person giving or receiving, it can be challenging to know what “Stuff” is worth to someone else. We need to have more open and candid conversations about the consumption of stuff and let people know when we prefer to receive less. When it comes to the art of gift giving, we can eliminate unneeded clutter and hurt feelings and give more thoughtful gifts by sharing our feelings openly and honestly. One way to give meaningful gifts that don’t create clutter is to share experiences and events, meals, concerts, vacations etc rather than buying actual things. This is my personal favorite way to stop clutter when it comes to the art of gift giving.

Another clutter trap that can stop us in it’s tracks is memorabilia. This might include kids artwork, handmade gifts (from family or friends) or things you associate with an event or occasion. This can be tricky, especially when you know someone spent minutes, hours, days or longer creating something for you. Maybe you can use it, maybe you know someone else who would love it more. You do not have to announce to the gift giver that you have sold or donated their masterpiece, you can discretely let it go when the time is appropriate.

Greeting cards and correspondence…Keeping every card you were ever given, just because you love someone doesn’t really help you remember the special moments! Keep a few special letters, cards and photo’s, take digital photo’s of a few you might be on the fence about and recycle the rest.

Memorabilia is more meaningful when you can easily access it rather than have to sort through a lot of clutter to find it.

Is your kids artwork clutter? It might be! Is this their first handprint or their fiftieth? Are they better at playing music than painting and putting together crafty creations? Create an artwork gallery wall, display things on rotation, snap photo’s of their art and as with above, only keep what is really unique, lets their personal creativity shine or helps you hold onto a very special memory. You are still an awesome parent even if you don’t keep every drawing, painting or artwork they ever made.

Before you buy, get to know your shopping triggers. This is not the post to cover addressing deeper issues with shopping addiction, yet I’m not making light of a situation that can be a big problem. Shopping for things we don’t need and spending more than we want can be a not so healthy pattern for the average person. Bring awareness to what you tend to shop for and when you find yourself wanting to spend. What are your patterns and traps? Do you love an estate sale, shoes, online shopping at 2am when you can’t sleep? Look for your traps and stop clutter before you buy. Find ways to distract yourself from shopping when you know you could easily fall into that trap. Delete the sale emails, don’t keep your tablet or phone by the bed, reward yourself for not shopping and use the one in, one (or more) out rule if you must shop. Buy things that you need, buy good quality but don’t buy for the sake of buying.

Want to learn more about what you really need and what you really use? Read this great article about the Pareto Principle.

Create a Practical Command Center

June 21, 2017 by Heather Filed Under: Kids & Family Organizing, Organize, Systems & Techniques, Tips & Resources 3 Comments

Today, I’m sharing ideas to Create A Practical Command Center. Since this month is all about kid-friendly organizing in the home I think it’s important to have a place where you can collect everything needed to “take command” of schedules, stuff and tasks for your family!

I’m going to break it down by why, where and what! Not every command center (and there are thousands on Pinterest to choose from!) will have what YOU need.

Create a Practical Command Center

[bctt tweet=”Get inspired by others but don’t get stuck repeating someone else’s idea of success.” username=”hkpowerstudio”]

Do you need help to Create a Practical Command Center?

Let’s start with your why. Defining the reason you need to create a command center is the first step!

  • Perhaps you’re losing things or can’t keep track of them, feeling overwhelmed, feeling rushed and you’re juggling too much information!
  • Mail is tossed everywhere including the kitchen counter, the coffee table, the dining room table or some other horizontal surface which means when you go to pick up, things get misplaced.
  • You have a hard time getting out the door with everything you and your family need.
  • Maybe you can’t locate homework or school paperwork & neither you nor your kids know where these things belong.
  • Do multiple schedules (both parents and kids) have you scrambling, missing appointments or running late?
  • Always looking for last minute gifts because you missed that party invitation? information for your babysitter or other important items you need regularly.

The next important step in creating a practical command center is knowing what you need to include.

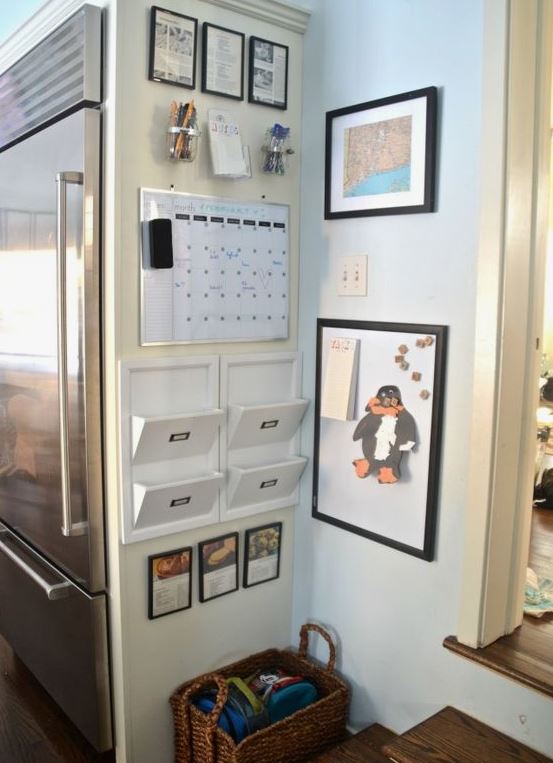
Creating A Practical Command Center

  • Mail sorting station-which might include trash, recycling bins and shredder-with individual slots for household members
  • Calendar or schedule-either a traditional paper system or a white/blackboard calendar. Decide what information will be included on this calendar. Maybe it’s just for the kids and family activities (sports, parties, Dr’s Apts, school events etc). Each family member or category can be assigned a color for easy tracking.
  • Charging Station
  • Grab & Go Kid Stuff-If you have small children, having extra supplies in a cabinet, ready to go is a great time saver. Include activity books, diapers, bug spray, change of clothes or other essentials for small children.

Create a practical command center

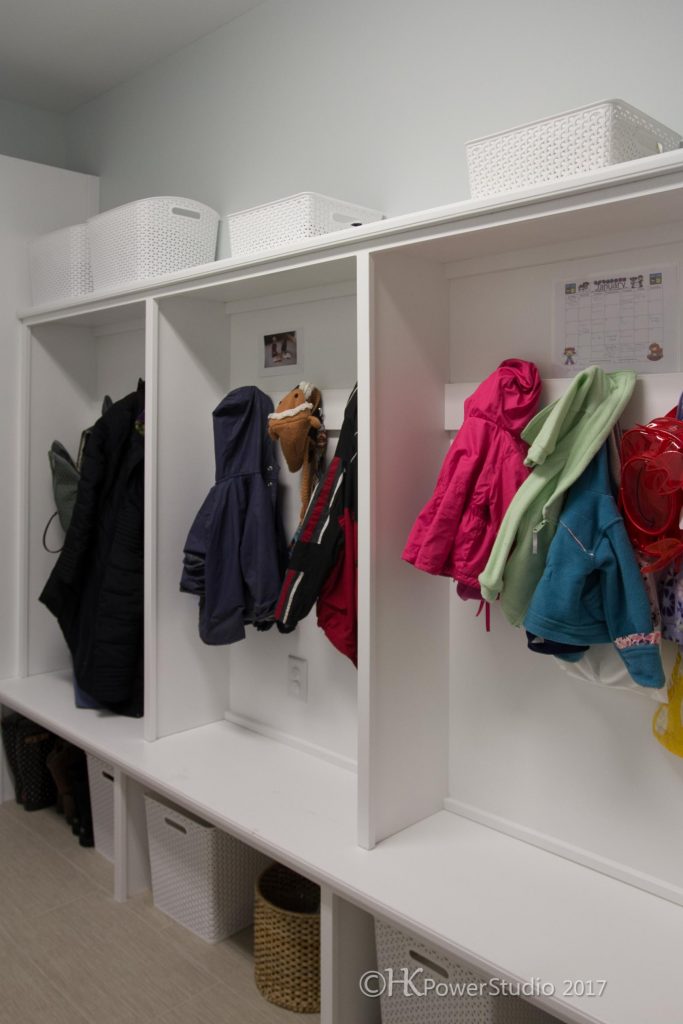
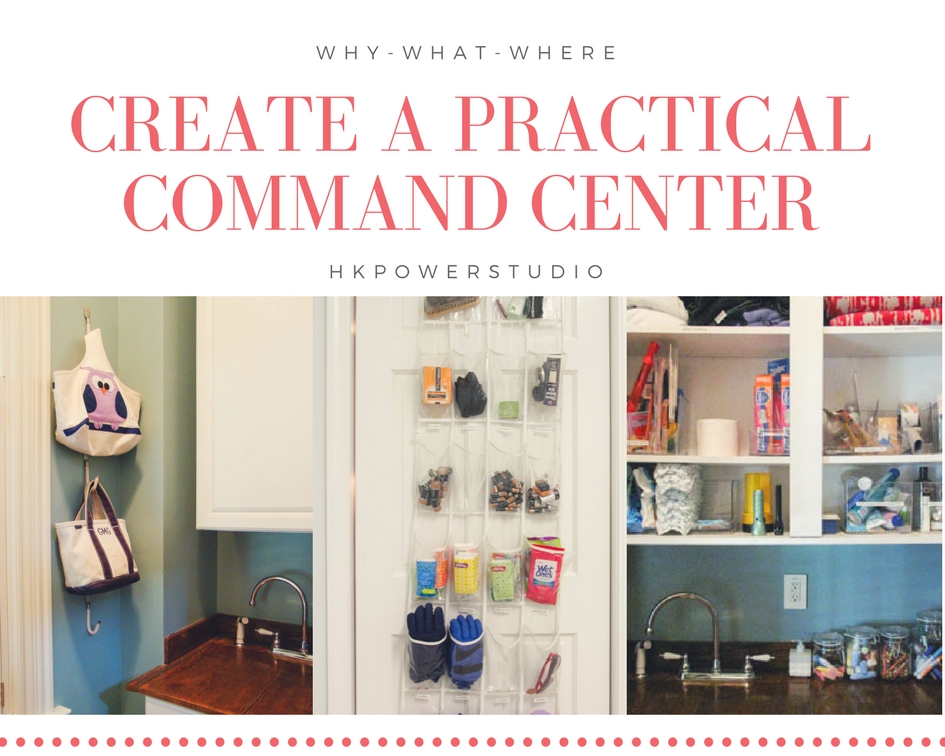
  • Bags, backpacks and other gear-if you have the space you can incorporate cubbies, baskets or hooks for storage. This area is for regularly used shoes, bags and purses and is a great place for people to drop items without cluttering up the main part of the house. Something similar can be set up in a closet, with an organizer hanging inside the door. Label each household member’s hook, cubical or shelf. Practice regular weekly to tidying (putting things away, cleaning out bags etc).

Creating a Practical Command Center

  • Key Hooks
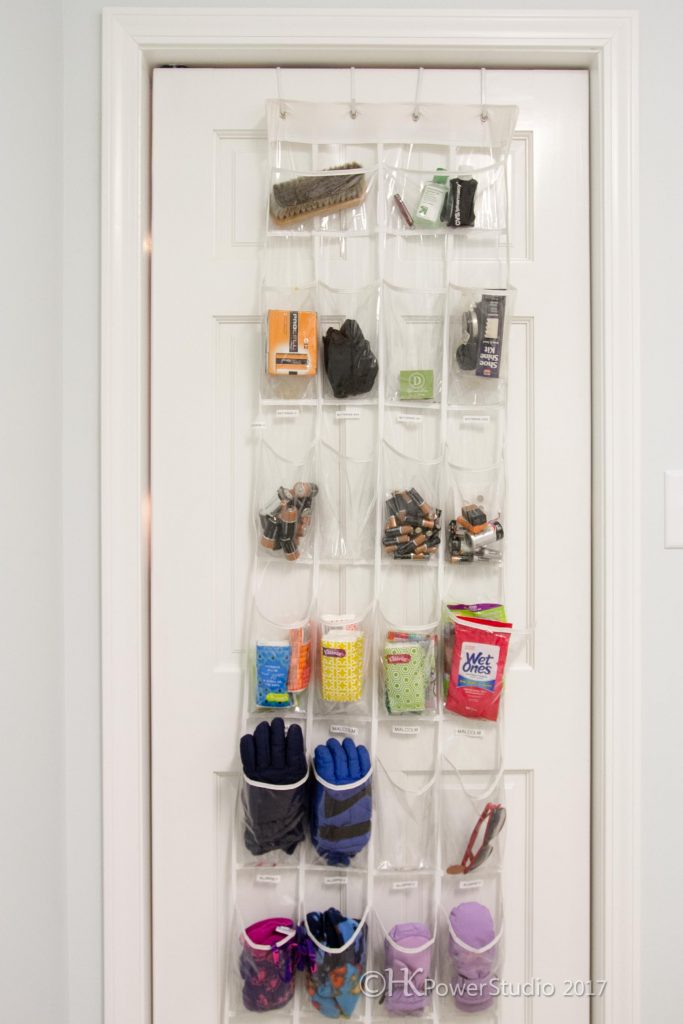
  • Basic utility items-this can be a drawer or a hanging organizer with things like batteries, pens/pencils, chargers, scissors, notepads, a hammer/screwdriver, tape measure and anything else you use regularly. Identify what you want to keep where so it doesn’t turn into a “Junk drawer”!
  • Fun stuff-a bulletin board, white/black or magnetic board, or hanging system for artwork and fun messages!
Creating a practical command center

Via Your Home Theater

  • Lists-to do, grocery or chore charts for parents and kids.
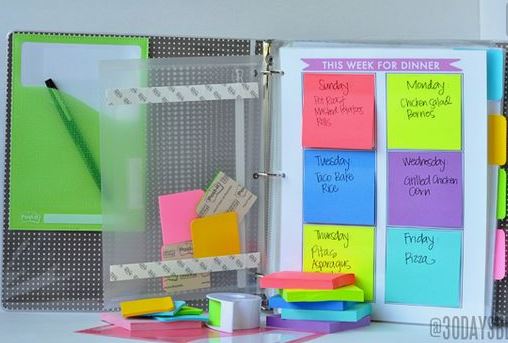
  • Household Binder-this is a great place for emergency contacts, vital household information (for babysitters etc), schedules, invitations and more! If space is limited you can create a command center in a binder! Just use different tabs for the different information you need to keep track of and keep it in a central location.

    Creating a practical command center

    Via Thirty Handmade Days

We all have different needs and when you know why you need some sort of command center it will give you insight into what to include. If you look at the list above and you say to yourself that you only need a couple of the items I included as examples then you can focus on creating a system that includes only what you need. Sometimes we get sucked in by other peoples systems because they have shared how great they work (for them) or we think it looks so incredible!

Being specific and simplifying your home management system will set you up for success!

Now that you understand why and what you need for creating a practical command center, let’s identify where this system should be.

Depending on your home and space considerations, here are a few places you might want to put a command center. If you don’t have space to put everything in one spot, that’s okay. Paperwork, mail, electronic’s, your binder or supplies could go in one area and hooks for keys, clothing and gear could go someplace else.

  • Near the front door
  • Mudroom
  • Kitchen
  • Laundry Room
  • Hallway or other central location
  • Closet or niche-including the inside of the door
  • A simple binder or portable bin (accordion file, file tote etc)

Here are a few tips to help you identify how to install your command center.

Go Vertical to get things up off your counters and on the wall. You can use the side or inside of a cabinet. If you have a lot of shelves, bins etc to hang, create paper templates and tape them up until you’re happy with the arrangement. This will save you patching unnecessary holes!

  • Hooks-anything from command to fancy decorative hooks
  • Shelves-floating or brackets, for small lightweight items
  • Baskets and bins-from shoes to paperwork, corral it in bins 

I love to use these clear pockets for small stuff (bug spray, glue, gloves and more!).

Create a Practical Command Center

Label things and assign lower spaces for small kids, upper spaces for adult stuff you don’t want the kids to get into!

Keep it simple-eliminate un-necessary clutter. Maintain your new system by assigning one day a week for a quick tidy up. Friday’s and Sunday’s are both great days for this 15 min assignment. After a few weeks or month keep it simple and eliminate the unnecessary clutter of items you are not using. Start simple and if the system works, expand upon it and get creative to make it as beautiful as it is practical!

Need additional help identifying why, what and how to create a practical command center? Give me a shout and let’s see how I can help you create a perfect command system for your household!

  • « Previous Page
  • 1
  • …
  • 8
  • 9
  • 10
  • 11
  • 12
  • …
  • 22
  • Next Page »

Search this site…artists, tips, posts & more!

Fresh Posts

fuzzy goals

Fuzzy Goals-Smarter than SMART?

genesis of collecting

The Genesis of Collecting

What Is Provenance—and Why Does It Matter?

Navigating Appraisals and Auctions

Curb Kitchen Chaos

Curb Kitchen Chaos

Unraveling Courage

Unraveling Courage

Search blog by Popular Category

info@hkpowerstudio.com
[office] 240-778-2804 *area code must be dialed/no text

Search Blog by Popular Catetories

Seach Blog by date

Copyright © 2025 · Swank WordPress Theme By, PDCD